It’s essential to create secure connections between networks and resources in order to guarantee data privacy and trustworthy access. But it gets difficult to keep up with all the connections we make since there are so many of them.
Fortunately, IBM’s VPN services, Client-to-Site VPN and Site-to-Site VPN, allow you to immediately optimize your VPN connections. To connect to your IBM Cloud and on-premises environments via a single Client-to-Site VPN connection, feel free to follow the procedures provided in this blog article. You can read more about these offerings here.
Figure 1 below shows a graphic representation of the use case. A single Client-to-Site VPN connection is used by end users to access to both the VSIs in their IBM Cloud VPC and the instances and databases in their on-premises environment:

Your IBM Cloud account must first deploy a Client-to-Site VPN server and gateway for this optimal design.
Prerequisites
- An IBM Cloud account with a VPC and at least one VSI to verify VPN connections.
- IAM rights, Security Groups, and ACLs needed to create VPN gateways and other resources.
- On-premises peer device and Subnet CIDR data.
- Your local laptop’s OpenVPN client will verify VPN connectivity.
Steps to set up both VPNs simultaneously
Create a Site-to-Site VPN first, then a Client-to-Site VPN. To connect VPNs, we’ll construct routes, authentication, and service-to-service authorisation after deployment. Finally, we’ll install OpenVPN on the laptop and test IBM Cloud and on-premises connectivity. Each step will be explained below.
Create the Site-to-Site VPN gateway
Before starting this phase, gather your on-premises Peer Gateway, Preshared Key, and IKE and IPsec policies.
Log in to IBM Cloud Catalog, search “VPN” and pick VPC VPN. Choose Site-to-site gateways and enter the gateway’s deployment location and other information. Choose route-based for the VPN tunnel.
Click the right-hand Create VPN gateway button. This connects your IBM Cloud to your on-premises data center via VPN. The IBM Cloud portal should show the gateway as active after creation. Right now, the connection is ready to transport IBM Cloud traffic to your on-premises system.
Create Site-to-Site VPN routes
After connecting to the VPN, we’ll design VPN routes to connect IBM Cloud VPC to your on-premises router. Create a VPN route in the VPC Routing Tables or use an existing one. Enter all needed fields. As an example:
- Subnet destination: on-premises CIDR
- Action: Deliver
- Type of next hop: VPN connection
- The VPN gateway: It is the newly created VPN .
- VPN connection: Connection name supplied when creating VPN gateway.
Here are detailed instructions for designing and managing routes.
Important: After creating routes, attach VPC source subnets to the routing table.
You should now have a VPN with routing between your IBM Cloud VPC and on-premises environment. Figure 1 shows this flow in red.
Set up authentication and authorization
Before creating a Client-to-Site VPN, we must generate and store client and server certificates in IBM Cloud Secrets Manager. Generate and import certificates into Secrets Manager using these methods.
Establishing a service-to-service permission for the VPN Server and IBM Cloud Secrets Manager allows the VPN to access Secrets Manager certificates.
Client-to-Site VPN server creation
Enter IBM Cloud Catalog, search VPN, and pick VPC VPN. Client-to-site servers and the gateway deployment location (with all input parameters) are selected. This article uses a solo configuration. Select a CIDR range for the Client IPv4 address pool to assign IPs to client connections. In Subnets, fill out all required fields.
Configure Server and Client Authentications next. Select Server and Client Certificates from Secrets Manager from earlier procedures. Choose User ID and passcode for further security. Finally, configure Security Group rules to enable VPN traffic into the network.
To allow all traffic across the VPN interface and into the VPN tunnel, select Full tunnel in this form. The rest of the input options are optional. Click the right-hand Create VPN server button.
Create Client-to-Site VPN routes
Once the connection is operational on the Portal, you must construct two routes: one for VPC resources and one for remote/on-premises network access. Click here for route creation instructions. In the VPC diagram above, solid green and red dashed lines represent this flow.
Configure client profiles
Finally, download the VPN server client profile. Click Download client profile on the Clients tab of your IBM Cloud VPN server. Add Client certificate and Private Key to Client Profile.ovpn.
This article describes how to configure the client VPN environment to connect to a VPN server.
Config OpenVPN client and test connectivity
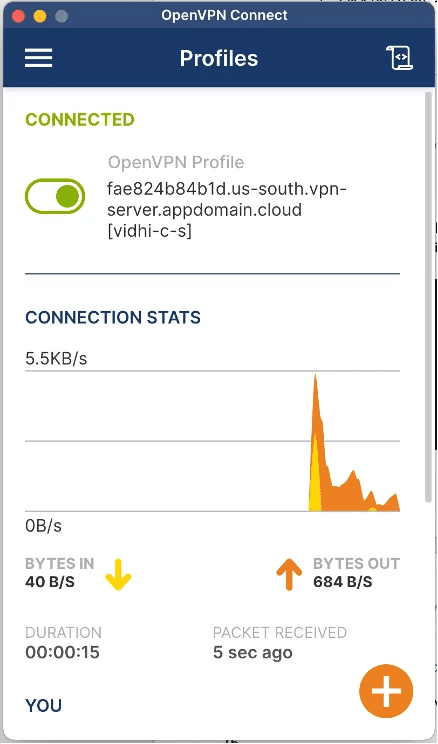
A VPN client is needed to access IBM Cloud and on-premises environments. Here you can download and install a VPN client for your operating system. Install OpenVPN and open the client to connect to the VPC using the profile established in the previous steps.

This VPN connection lets users connect to their IBM Cloud VPC and on-premises environment via IBM Cloud VPN. Visit the Clients tab on the VPN server in your IBM Cloud interface to verify client connections.


[…] cyberthreat is a sign that a hacker or other malicious actor is trying to log into a network without authorization to launch a […]
[…] IBM. Wazi is a family of tools for providing cloud-native development and testing for z/OS in the IBM Cloud, as well as delivering a cloud-native DX for z/OS. With Wazi, developers can quickly spin up a z/OS […]
[…] and cloud-based IT infrastructures are growing in enterprise enterprises. Compared to on-premises systems, digital solutions offer extraordinary flexibility, scalability, and […]
[…] core business platforms are moving from on-premises infrastructures typical of old IT outsourcing to the cloud’s flexibility, reliability, and scalability. AWS […]
[…] are clear, ERP software can be purchased in this step. These needs depend on whether a firm employs on-premises or cloud […]
[…] due to developments in cloud computing, data management, and AI. Hybrid cloud solutions integrate on-premises, private, and public clouds to let organizations operate critical workloads […]