DigiME, an AI-powered motion capture and streaming program, was co-developed by Red Pill Lab and MSI. It enables you to make a virtual persona, position it in a preferred virtual environment, and broadcast it to your viewers.
The finest aspect? It doesn’t require any special equipment!
How Does DigiME Work?
With DigiME, it used a different strategy from traditional motion capture, which usually depends on costly gear, strong hardware, and intricate sets.
DigiME allows full body motion capture with just a regular webcam and a microphone thanks to its AI-powered motion recognition engine. Additionally, it has extensive compatibility with a wide range of streaming and video conferencing applications, providing broadcasters with a fresh means of communicating with and involving their viewers.
Fundamentally, DigiME is designed to take advantage of the ray tracing capabilities of Intel’s next-generation NPU, which is integrated into its Core Ultra (Series 2) desktop processors, and NVIDIA RTX graphics cards.
The NPU provides a strong, more effective method of handling AI calculation workloads like real-time motion capture, while the graphics card manages the real-time rendering of your virtual environment.
You can still use your existing processor’s integrated graphics if you don’t currently have an NPU. However, in terms of performance, you can get different results.
How to Get Started with DigiME
DigiME is designed to be as basic as possible, guaranteeing an easy-to-use and navigate interface.
After logging in, you can use the UI to personalize your preferred place and avatar.
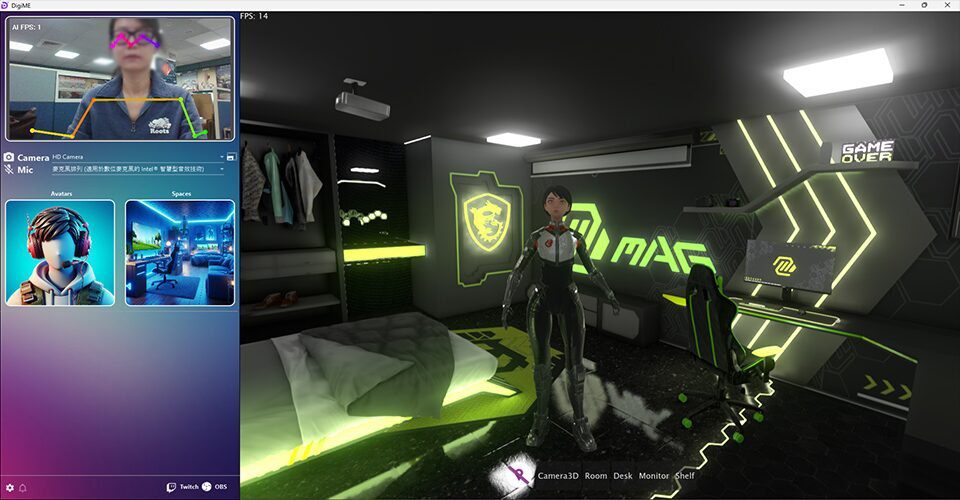
The program will now launch in a window similar to the one below.

Your camera feed appears on the upper left corner of the main DigiME screen, followed by your camera and microphone devices, and then the “Choose Avatar” and “Choose Spaces” options.
Make sure the appropriate microphone device is chosen from the drop-down option and that your camera feed appears in the upper left corner before proceed. Select the appropriate camera from the Camera drop-down menu if yours isn’t shown.
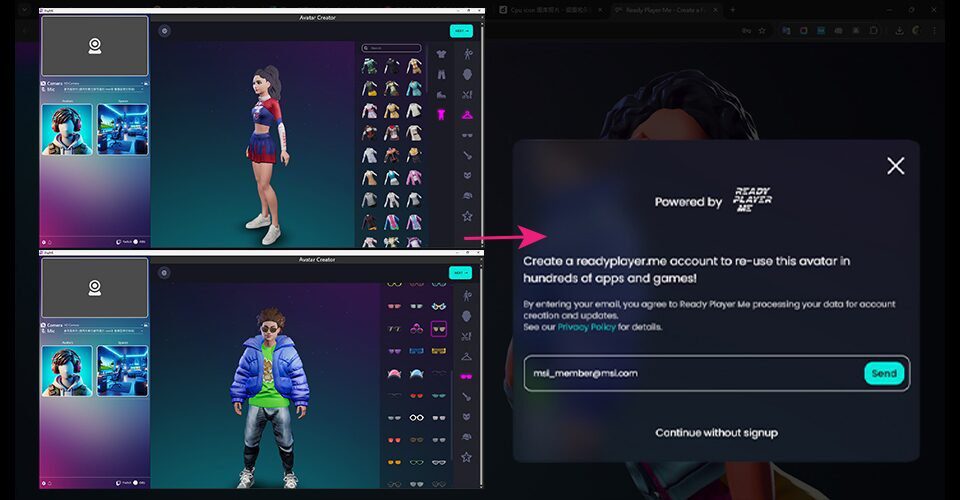
Let’s begin creating avatar now! After choosing “ReadyPlayerMe,” the avatar interface ought to appear.
After logging into your account, you can import any existing avatars into DigiME since it supports ReadyPlayerMe avatars. You can store your personalised avatars to the cloud by creating an account later if you don’t already have one.
After logging in (or bypassing this step), you may begin making your own avatar.
There are two methods for making a personalised avatar. Avatars can be produced using photos or pre-made options. You can take a picture with your webcam or upload one.
We’re going to use the webcam for this guide. Please ensure that you can see your face clearly.
Once your photo is uploaded and you like it, you can personalize the virtual model. You may personalise your avatar with stylish accessories, haircuts, makeup, and more.
Once you’re happy with your creation, name the avatar and save it. You now have the option to store this avatar to the cloud and register for a readyplayer.me account, which will enable you to use it in other apps.

In any case, when you select “Choose Avatar” in the DigiME main screen, the avatar you just generated will now be available.
It will then select the virtual space of choice. To browse a list of all the virtual spaces that are available within DigiME, click “Choose Spaces,” then navigate to the “Store” to select your preferred one.
One room is included in the application by default, and there are more that you may download from the store, each with a different look. After you’ve decided on a room that you like, choose it to immediately replace your actual surroundings!
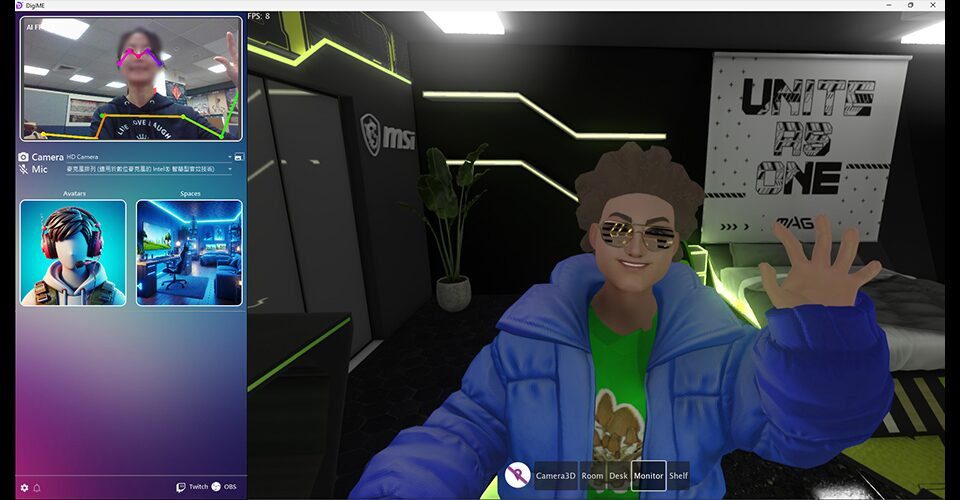
Your virtual avatar should now appear in your centre interface, moving and lip-syncing to your speech and motion, respectively, if all went according to plan. Additionally, the avatar ought to appear in the virtual area you selected above.
Before proceeding to the next step, ensure sure it is in sync by testing it out.
You can further customise your virtual self and space, as well as how you engage with your audience, by selecting from a range of camera positions in the centre bottom of the DigiME interface.
Select the camera that you think looks the best. Here, you can adjust its appearance even further by using your mouse’s scroll wheel to zoom in or out of the scene. When necessary, you can use it to highlight the area or your virtual self in real time.
It’s crucial to optimise your DigiME experience before go online. “Mirror Webcam” is the first of several settings that assist you in doing so.

If you’re more comfortable with a mirrored feed when streaming, simply enable this feature. Otherwise, movement may feel awkward.
DigiME provides a suite of sophisticated capabilities for consumers who want to customise their experience.
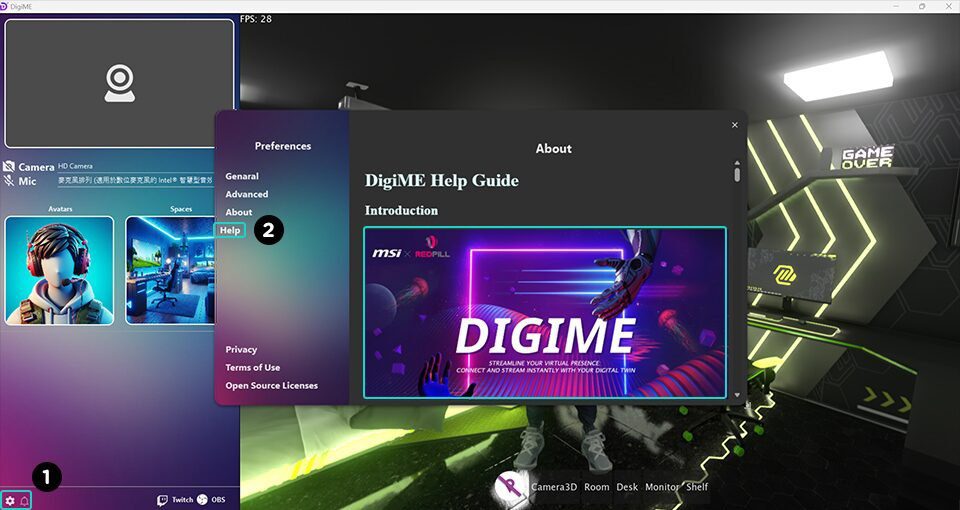
To access the interface seen above, navigate to settings and select “Advanced” from the left menu.
Here, you may adjust the camera’s field of view (FOV) to further customise your virtual environment and identity, choose your preferred render resolution (to lessen the strain on your GPU), and select your choice AI inference device (MSI suggests an NPU).
It’s time to connect to the internet after you’ve finished adjusting these settings! Select your preferred streaming app, then launch it. They have chosen to use Google Meet for demonstration purposes.
The “DigiME Camera” should appear as a camera choice in your streaming/conferencing software if DigiME is configured properly. When you select it, your DigiME virtual persona and space ought to appear.
The procedures are quite consistent whether you’re using Skype, Streamlabs, OBS, or any other program.
Because of its wide interoperability, DigiME appears to your operating systems as a camera. To get your virtual avatar online, just select “DigiME Camera” as your camera in the application of your choice!

Recommended Hardware for the Best DigiME Experience
Advise using a processor with an on-chip NPU, such as Intel Core Ultra 200 processors, and at least an RTX 2060 GPU for the optimal DigiME experience. You can use your integrated graphics if you don’t have access to an NPU.
The capabilities required to manage these contemporary AI workloads are already present in more recent desktop computers and desktop CPUs. Therefore, having a strong platform to help them is crucial.


